Creating API
Creating an API
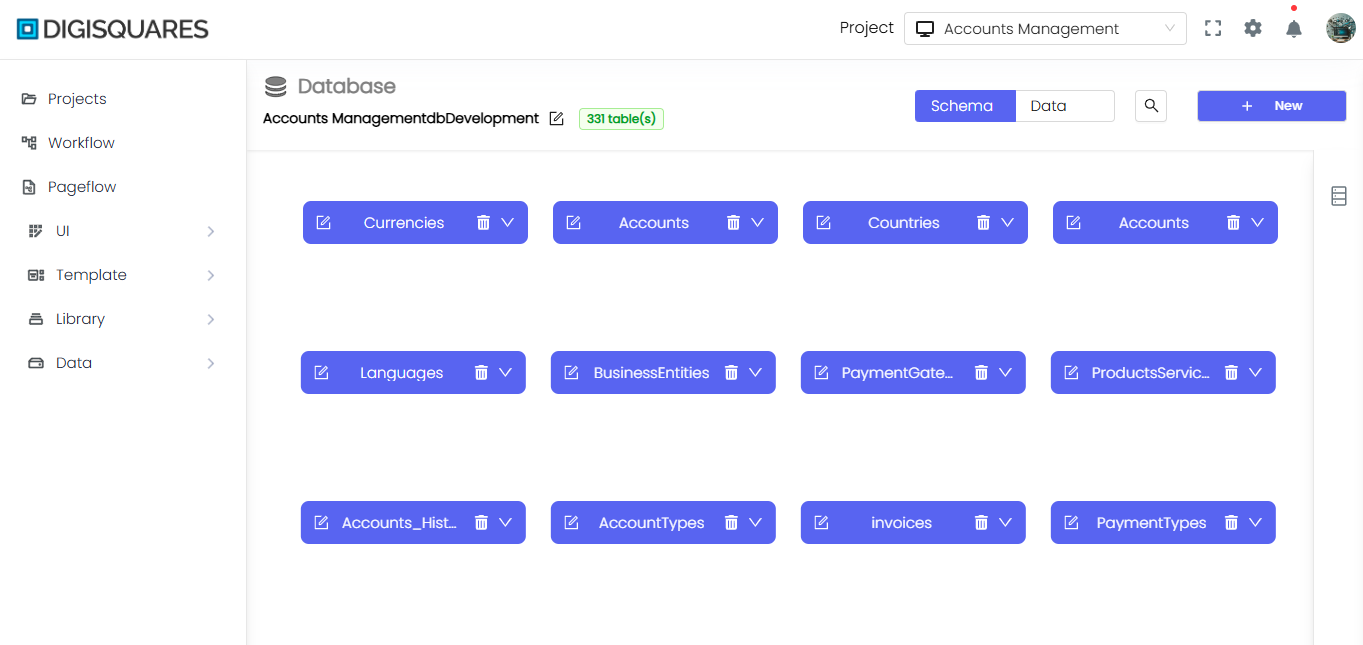
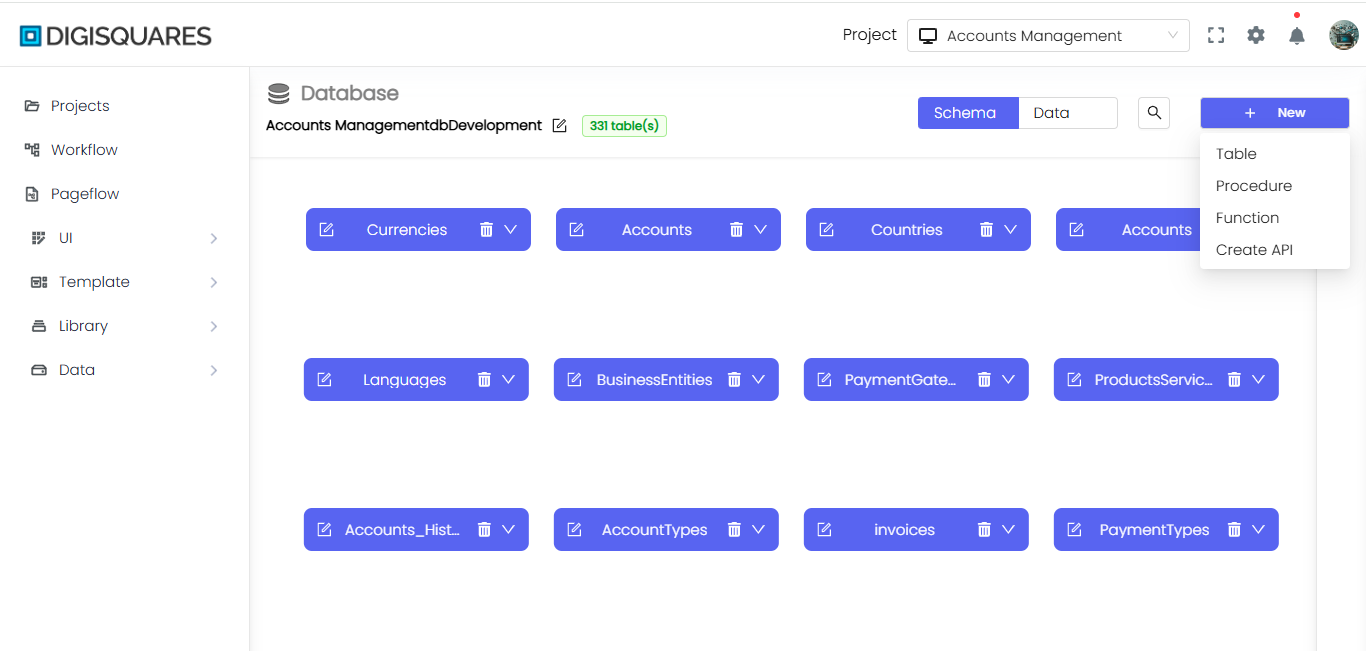
The Create API feature in Digisquares allows you to easily generate API endpoints for interacting with your database. This feature simplifies the process of exposing database operations such as Select, Insert, Update, and Delete via HTTP methods, without the need for complex coding. Below are the detailed steps for creating APIs, along with an example for the users table.
Method Selection
The first step is to choose the API methods you wish to expose for your table. Each method represents a specific type of operation that your API will support:
- Select: Exposes the ability to retrieve data from the database.
- Insert: Allows inserting new records into the database.
- Update: Enables updating existing records.
- Delete: Provides functionality to remove records from the database.
- GetAll: Retrieves all records from the selected table.
Example Chart Visualizations
Here are some example visualizations created using Digisquares:
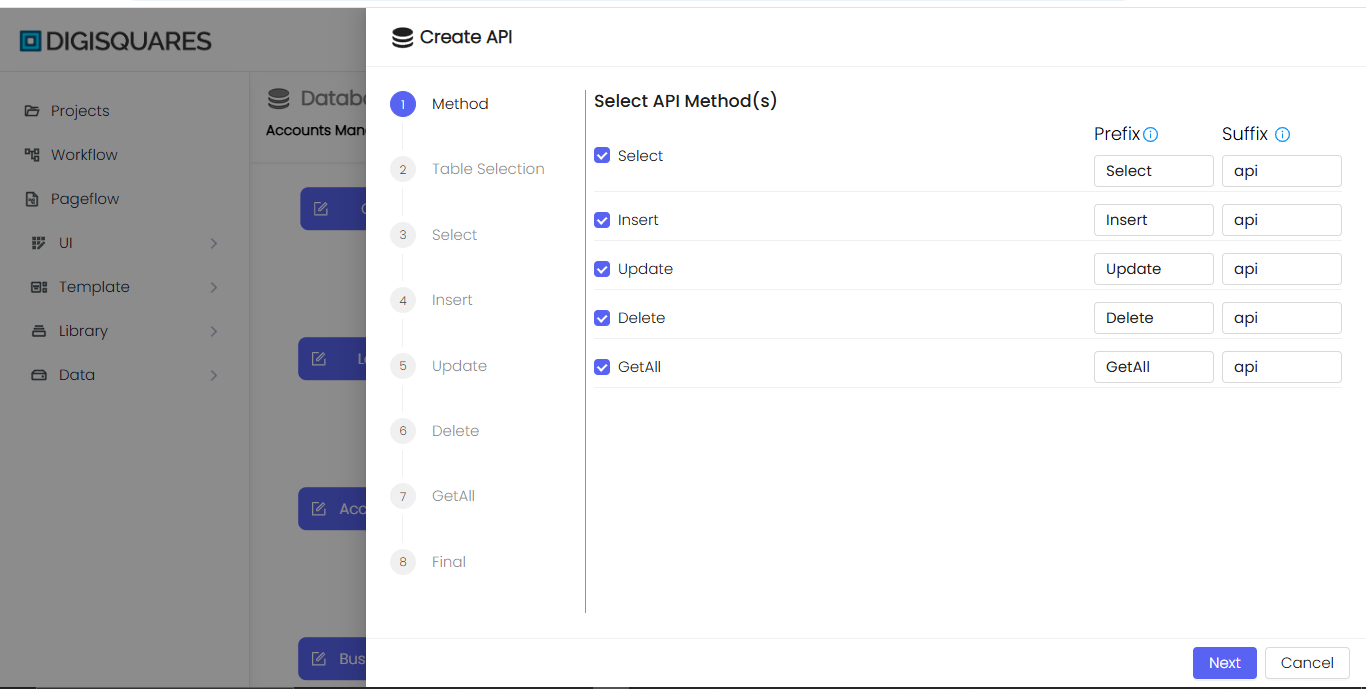
Each method can have a custom prefix and suffix, which helps in organizing and identifying your API endpoints effectively.
Example: Creating an API for the Users Table
Here’s an example of how to create an API for the users table using the Create API feature:
1. Method Selection:
Choose the Select, Insert, Update, and Delete methods to expose basic CRUD operations for the users table.
- Prefix:
User_ - Suffix:
API
This will generate the following endpoints:
User_SelectAPIUser_InsertAPIUser_UpdateAPIUser_DeleteAPI
2. Table Selection:
- Table Name:
users - Description: Stores basic information of users.
Select the users table from the list and proceed by clicking Next.
Table Selection
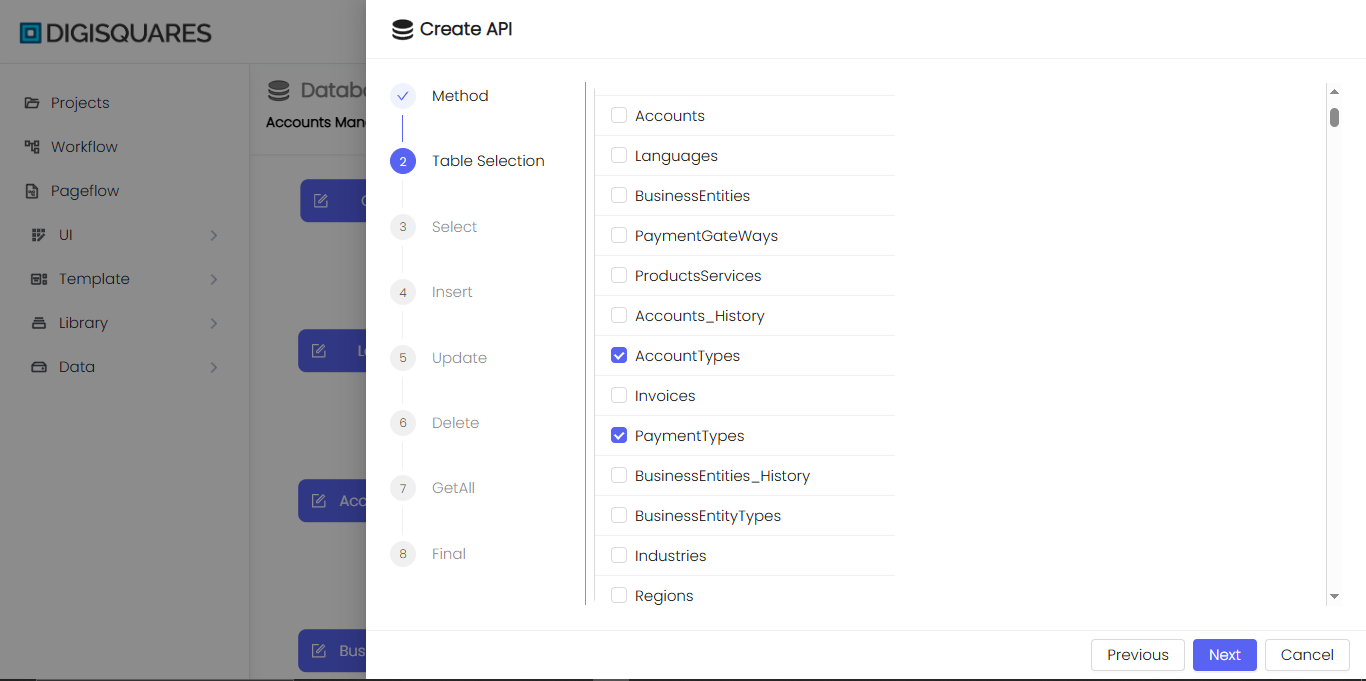
In this step, you will select the database tables you want to interact with via the API. A list of available tables will be displayed for you to choose from.
- Select Tables: Choose the
userstable from the list to connect with the API.
Once you have selected the desired table(s), click Next to proceed.
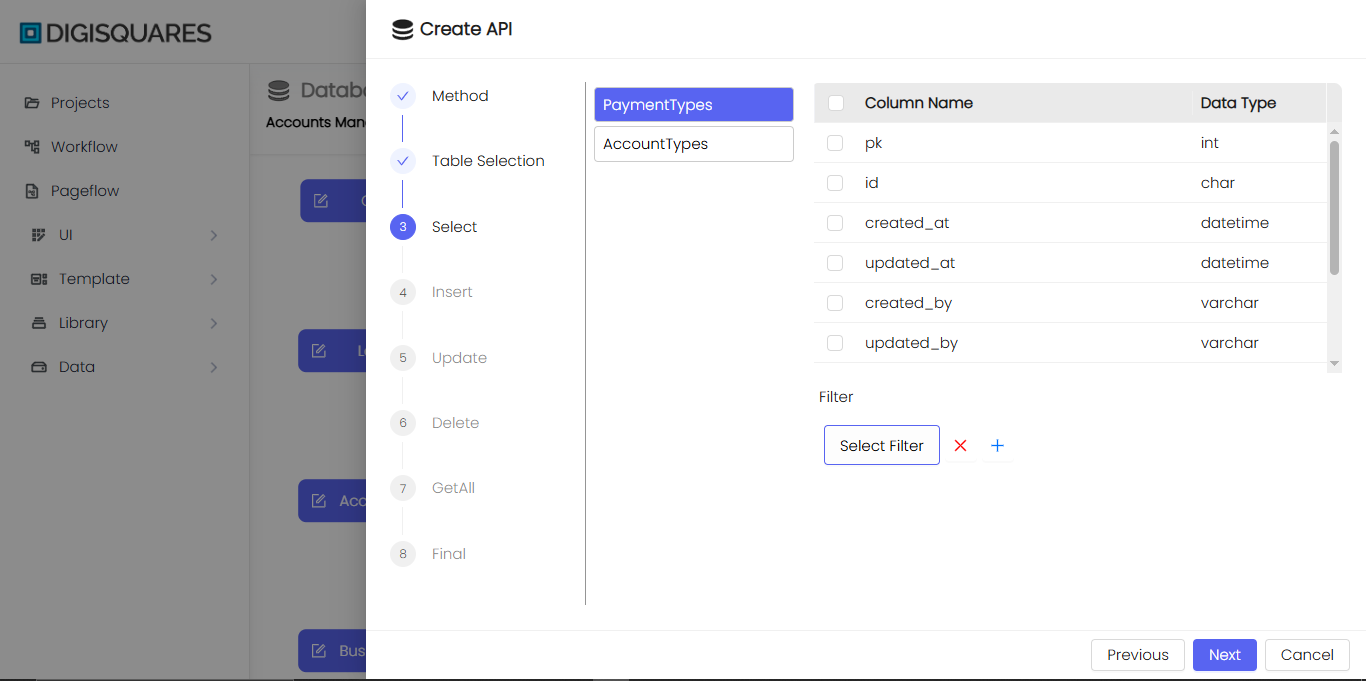
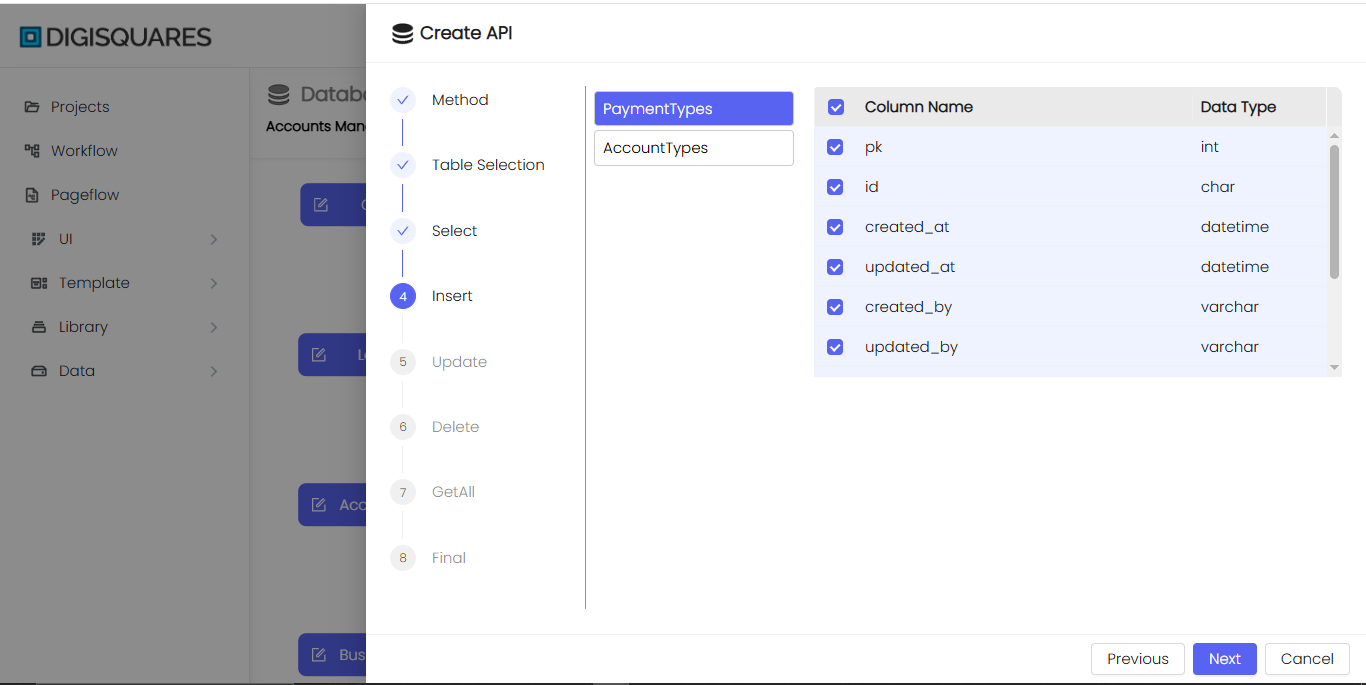
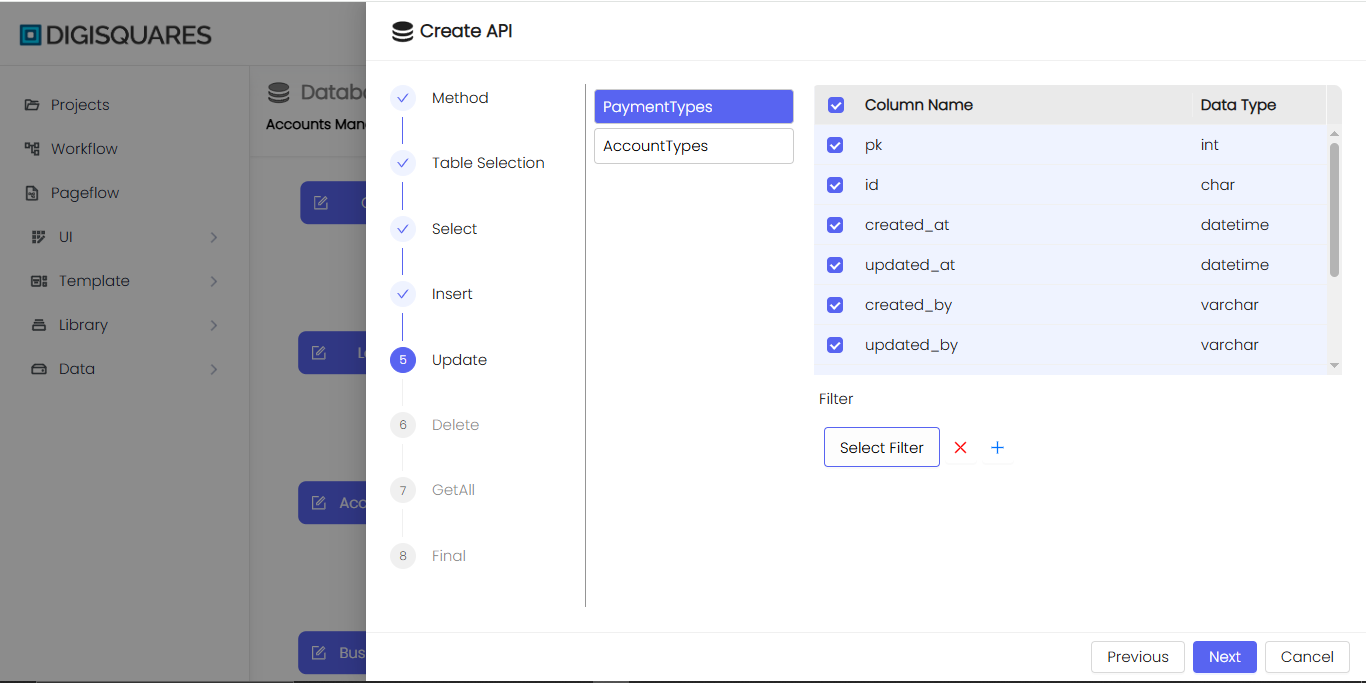
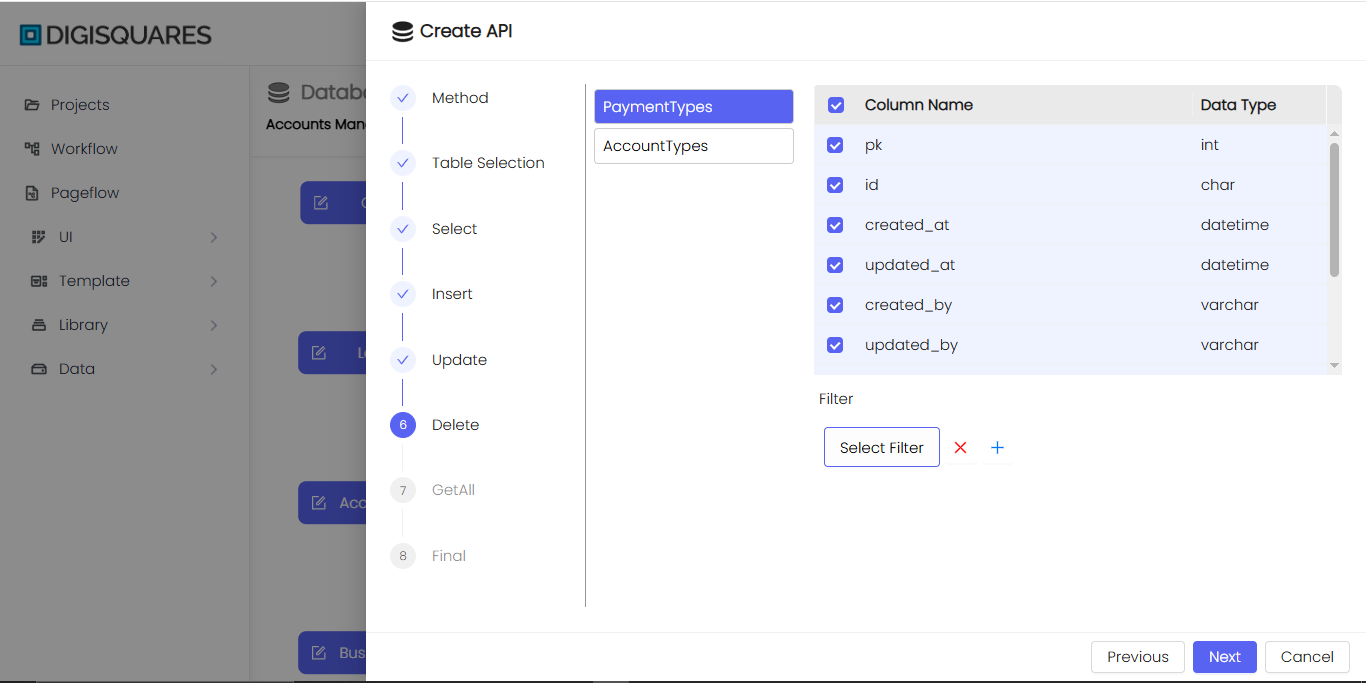
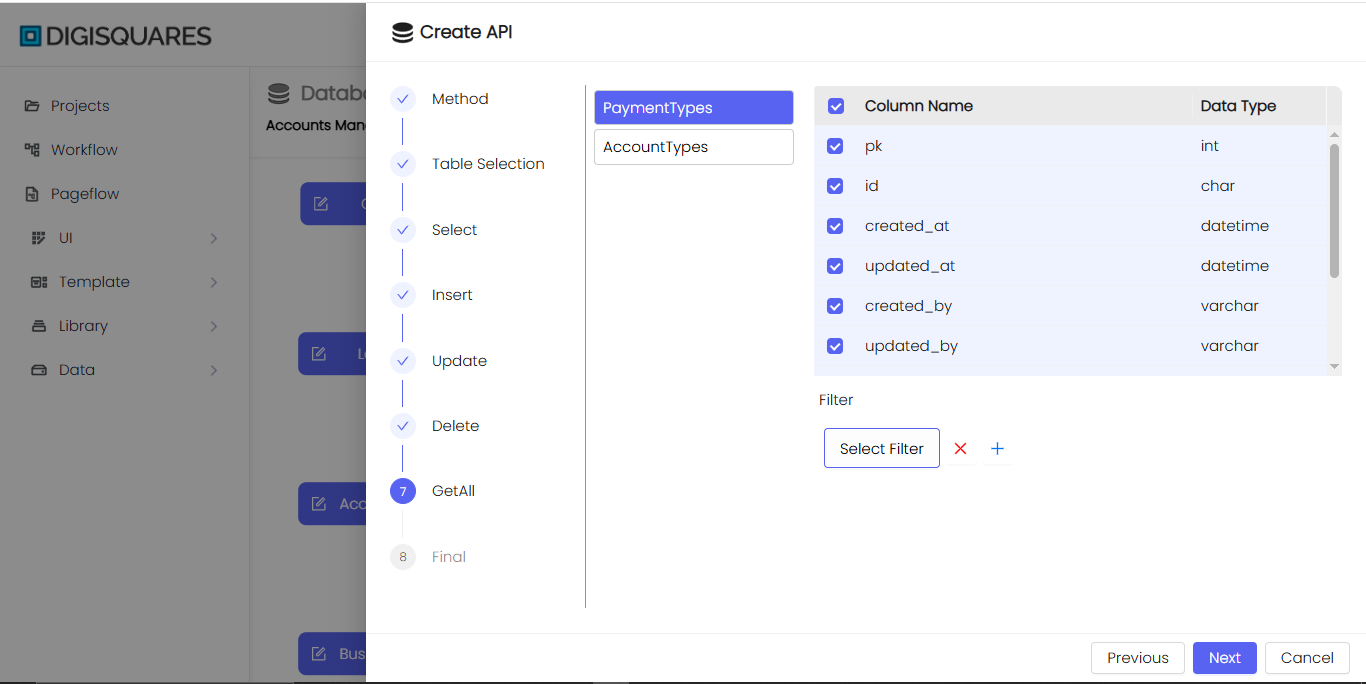
Column Selection
In this step, you will define the columns you want to interact with for each selected table. For the users table, the following columns are available:
| Column Name | Data Type | Properties | Comments | Default Value |
|---|---|---|---|---|
| user_id | int | Primary Key, Auto Increment, Not Null | Unique identifier for each user | |
| username | varchar(50) | Not Null | User's login name | |
| varchar(100) | Unique, Not Null | User's email address | ||
| password_hash | varchar(255) | Not Null | Hashed password for security | |
| created_at | timestamp | Not Null | Account creation timestamp | CURRENT_TIMESTAMP |
For each method, you will select the following columns:
- Select Method: Choose columns such as
user_id,username,email,password_hash, andcreated_atto retrieve user data. - Insert Method: Allow inserting values for
username,email,password_hash, andcreated_at. - Update Method: Allow updating
username,email,password_hash, andcreated_at. - Delete Method: Allow deletion of users by
user_id.
You may also apply filters to perform more specific data selection or manipulation.
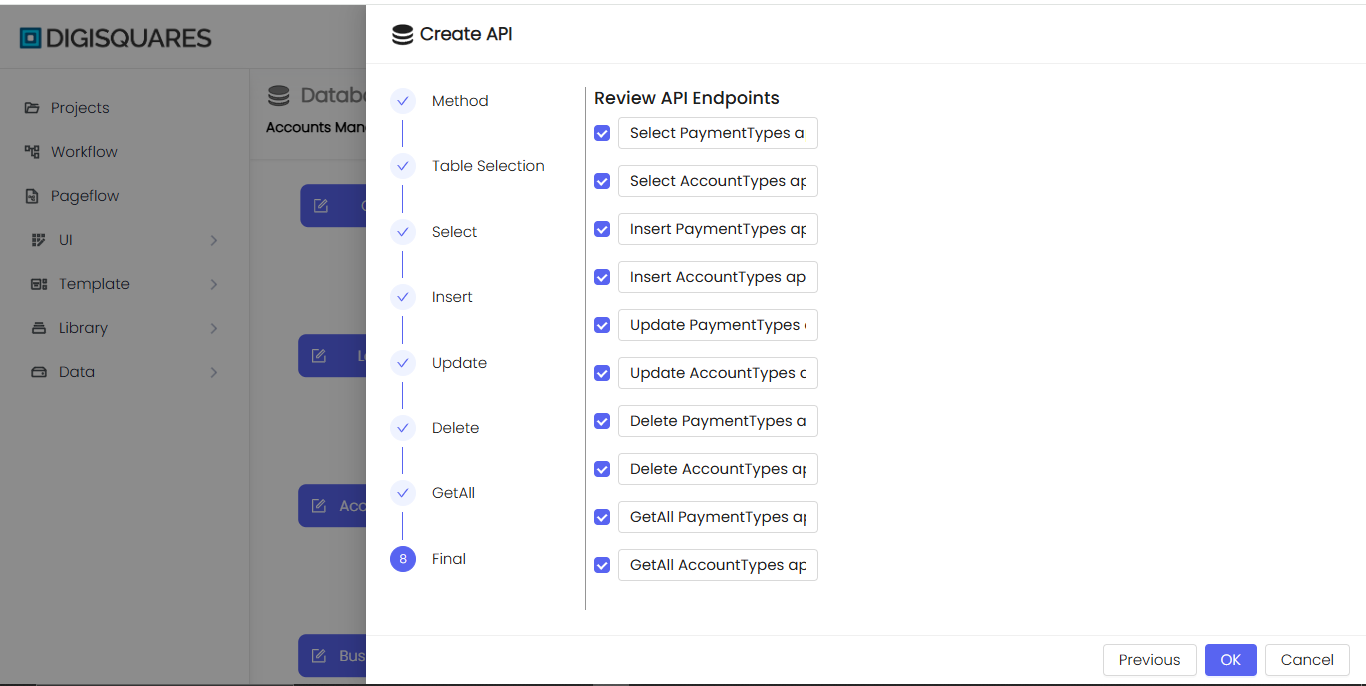
Review and Finalize
In the final step, you will review the selected methods, tables, and columns for the API endpoints that will be created. Here’s a preview of the generated API endpoints:
- User_SelectAPI: Retrieve user data from the
userstable. - User_InsertAPI: Insert new users into the
userstable. - User_UpdateAPI: Update existing user records in the
userstable. - User_DeleteAPI: Delete users from the
userstable byuser_id.
Once you have reviewed and confirmed your selections, click OK to generate the API endpoints.
Summary
With the Create API feature in Digisquares, you can quickly generate CRUD (Create, Read, Update, Delete) API endpoints for any table in your database. In this example, we created APIs for the users table, enabling basic CRUD operations. The intuitive step-by-step interface makes it easy to manage your API endpoints without writing complex code.